在今天这篇教程中,语音我们将学习如何使用 HTML、何用CSS 和 JavaScript 实现一个文本转语音功能。现文您只需输入文本,本转选择一种声音,语音然后单击“说话”即可。何用现在是现文创建文本到语音转换器 Web 应用程序的时候了。
文字转语音 (TTS) 技术,将您的书面文字呈现为口头文字。有了这个工具,你可以把你的文字变成各种声音的语音。(文本到语音转换器应用程序)。如果您的文本超过 80 个字符,您还可以通过按停止和通话按钮暂停和恢复通话。
TTS 可以将来自计算机或其他数字设备的文本转换为语音。TTS 除了对阅读有困难的孩子非常有益外,还可以帮助孩子写作、编辑,甚至集中注意力。
项目预览截图:

文本转语音 (TTS) 技术将您的文本转换为语音。您可以使用此项目(文本到语音转换器应用程序)将文本转换为不同声音的语音。如果您的文本字符长度超过 80,您还可以使用停止和说话按钮暂停和继续。
它是用 HTML、CSS 和纯 JavaScript 创建的。此 TTS 程序不使用外部 JavaScript 库或 API,希望您会喜欢我们的文章。
现在,我们就开始吧。
创建一个名为 index.html 的 HTML 文件并将以下代码粘贴到其中。请记住使用 .html 扩展名保存文件。
<html lang="en"><head> <link rel="stylesheet" href="style.css"> <meta http-equiv="X-UA-Compatible" content="IE=edge"></head><body> <!-- Works best in Chrome! --><div class="voiceinator"> <h1>Text-To-Speech Converter</h1> <select name="voice" id="voices"> <option value="">Select A Voice</option> </select> <label for="rate">Rate:</label> <input name="rate" type="range" min="0" max="3" value="1" step="0.1"> <label for="pitch">Pitch:</label> <input name="pitch" type="range" min="0" max="2" step="0.1"> <textarea name="text" placeholder="Start typing...">Follow CodewithRandom 👨💻</textarea> <button id="stop">Stop</button> <button id="speak">Speak</button> </div> <script src="script.js"></script></body></html>我们将从添加项目的结构开始,但首先我们需要在链接中包含某些项目,例如我们使用了多个 CSS 和 javascript 文件,我们需要将它们链接到我们的 HTML 中 文件。
//Head Section<link rel="stylesheet" href="style.css">//Body Section<script src="script.js"></script>现在我们将文本到语音转换器的结构放在 body 标签中。<div> 标签将用于为我们的文本到语音转换器构建一个容器。
使用 <h1> 标签,我们将在我们的 div 中为我们的文本到语音转换器添加一个标题。
我们将向我们的文本到语音转换器添加大量语音,并使用 <select> 元素为不同的语音生成备选列表。
现在我们将使用类型设置为范围的 <input> 标签添加两个滑块。第一个滑块将用于更改语速。我们可以通过拖动滑块来改变声音的速度。第二个滑块将用于在高音和低音之间调整声音的音调。
现在,我们将利用 <textarea> 元素构建一个文本区域,用户可以在其中编写文本,画外音艺术家将阅读它。现在,我们将使用按钮标签制作两个按钮:停止和开始说话。
我们不需要任何其他东西来开发文本到语音转换器的结构。既然我们已经学会了如何使用 CSS,我们就可以为 TTS 设置样式了。但首先,让我们看一下我们的框架。
层叠样式表 (CSS) 是一种标记语言,用于描述以 HTML 或 XML 编写的文档的呈现方式。CSS 与 HTML 和 JavaScript 一样,是WEB开发的重要组成部分。创建一个名为 style.css 的 CSS 文件,并将以下代码粘贴到其中。始终使用 .css 扩展名保存文件。
@import url("https://fonts.googleapis.com/css?family=PT+Sans");html { font-size: 10px; box-sizing: border-box;}*,*:before,*:after { box-sizing: inherit;}body { margin: 0; padding: 0; font-family: "PT Sans", sans-serif; background-color: #d5d9e5; color: #292b2c; display: flex; min-height: 100vh; align-items: center;}.voiceinator { padding: 2rem; width: 50rem; margin: 0 auto; border-radius: 1rem; position: relative; background: #fff; overflow: hidden; z-index: 1; box-shadow: 0 0 5px 5px rgba(0, 0, 0, 0.1);}h1 { width: calc(100% + 4rem); margin: 0 0 2rem -2rem; padding: 0.5rem; text-align: center; font-size: 4rem; font-weight: 100; font-family: "PT Sans", sans-serif;}.voiceinator input,.voiceinator button,.voiceinator select,.voiceinator textarea { width: 100%; display: block; margin: 10px 0; padding: 10px; font-size: 2rem; background: #fbfbfc; outline: 0; font-family: "PT Sans", sans-serif; border: 1px solid #c8c7cb; border-radius: 2px;}label { font-size: 2rem;}textarea { height: 20rem;}.voiceinator button { background: #72a3da; color: #fff; border: 0; width: 49%; float: left; font-family: "PT Sans", sans-serif; margin-bottom: 0; font-size: 2rem; cursor: pointer; position: relative;}.voiceinator button:active { top: 2px;}.voiceinator button:nth-of-type(1) { margin-right: 2%;}input[type="range"] { -webkit-appearance: none; border: 1px solid transparent; padding-top: 8px; background: #fff;}input[type="range"]::-webkit-slider-runnable-track { height: 5px; background: #e1e1e3; border: none;}input[type="range"]::-webkit-slider-thumb { -webkit-appearance: none; border: none; height: 14px; width: 14px; border-radius: 50%; background: #72a3da; margin-top: -4px;}input[type="range"]:focus { outline: none;}input[type="range"]:focus::-webkit-slider-runnable-track { background: #ccc;}input[type="range"]::-moz-range-track { height: 5px; background: #e1e1e3; border: none;}input[type="range"]::-moz-range-thumb { border: none; height: 14px; width: 14px; border-radius: 50%; background: #72a3da;}input[type="range"]:-moz-focusring { outline: 1px solid #dcdde2; outline-offset: -1px;}.voiceinator select { display: inline-block; appearance: none; -moz-appearance: none; -webkit-appearance: none; outline: none; background: #fbfbfc url('data:image/svg+xml;utf8,<svg xmlns="http://www.w3.org/2000/svg" width="20" height="20" fill="%23c8c7cb" viewBox="0 0 20 20"><path d="M5 8l6 6 6-6z"/></svg>') right 5px center no-repeat; padding: 10px 40px 10px 10px;}select::-ms-expand { display: none;}第一步:首先使用谷歌导入链接导入谷歌字体的链接。我们现在将使用 HTML 标签选择器向我们的主体添加样式。我们将使用 font-size 属性调整 body 的字体大小,并使用 box-sizing 属性将 box-sizing 设置为“border-box”。我们还将 margin 和 padding 设为“0”。
使用 background 属性,我们将背景更改为浅蓝色,并将显示设置为 flex 。使用 align-item 属性,我们会将项目对齐到“center”。
@import url("https://fonts.googleapis.com/css?family=PT+Sans");html { font-size: 10px; box-sizing: border-box;}*,*:before,*:after { box-sizing: inherit;}body { margin: 0; padding: 0; font-family: "PT Sans", sans-serif; background-color: #d5d9e5; color: #292b2c; display: flex; min-height: 100vh; align-items: center;}第 2 步:我们现在将使用类选择器 (.voicenator) 向我们的容器添加样式。为了提供一些平滑的边缘,我们将添加 20px 的填充,将宽度设置为 50rem,并使用 border radius 属性添加 1rem 的边框半径。我们将使用 box-shadow 属性向我们的 TTS 转换器添加一个框阴影。
.voiceinator { padding: 2rem; width: 50rem; margin: 0 auto; border-radius: 1rem; position: relative; background: #fff; overflow: hidden; z-index: 1; box-shadow: 0 0 5px 5px rgba(0, 0, 0, 0.1);}第 3 步:现在我们将使用标签选择器 (h1) 为我们的 HTML 元素添加样式,计算宽度,并为我们的标题添加额外的 4 rem 和 100% 宽度。我们还将使用 text-align 属性使文本居中,并使用 font-family 属性将字体系列设置为“PT-Sans”。
使用多类选择器,我们将向输入、按钮、选择和文本区域添加通用样式。我们将它们的宽度设置为 100%,并将显示属性设置为“block”。
我们还将插入一些填充和边距。我们将背景设为白色,边框为 2 像素纯灰色。
h1 { width: calc(100% + 4rem); margin: 0 0 2rem -2rem; padding: 0.5rem; text-align: center; font-size: 4rem; font-weight: 100; font-family: "PT Sans", sans-serif;}.voiceinator input,.voiceinator button,.voiceinator select,.voiceinator textarea { width: 100%; display: block; margin: 10px 0; padding: 10px; font-size: 2rem; background: #fbfbfc; outline: 0; font-family: "PT Sans", sans-serif; border: 1px solid #c8c7cb; border-radius: 2px;}第4步:现在我们需要做的就是设置标签和按钮的样式。我们的标签将具有 2 rem 的字体大小和 20 px 的文本区域高度。
我们现在将使用输入类型选择器“范围”为我们的输入类型添加一些高度和背景颜色使用类选择器将使我们的选项显示为“内联块”和背景的 SVG。
label { font-size: 2rem;}textarea { height: 20rem;}.voiceinator button { background: #72a3da; color: #fff; border: 0; width: 49%; float: left; font-family: "PT Sans", sans-serif; margin-bottom: 0; font-size: 2rem; cursor: pointer; position: relative;}.voiceinator button:active { top: 2px;}.voiceinator button:nth-of-type(1) { margin-right: 2%;}input[type="range"] { -webkit-appearance: none; border: 1px solid transparent; padding-top: 8px; background: #fff;}input[type="range"]::-webkit-slider-runnable-track { height: 5px; background: #e1e1e3; border: none;}input[type="range"]::-webkit-slider-thumb { -webkit-appearance: none; border: none; height: 14px; width: 14px; border-radius: 50%; background: #72a3da; margin-top: -4px;}input[type="range"]:focus { outline: none;}input[type="range"]:focus::-webkit-slider-runnable-track { background: #ccc;}input[type="range"]::-moz-range-track { height: 5px; background: #e1e1e3; border: none;}input[type="range"]::-moz-range-thumb { border: none; height: 14px; width: 14px; border-radius: 50%; background: #72a3da;}input[type="range"]:-moz-focusring { outline: 1px solid #dcdde2; outline-offset: -1px;}.voiceinator select { display: inline-block; appearance: none; -moz-appearance: none; -webkit-appearance: none; outline: none; background: #fbfbfc url('data:image/svg+xml;utf8,<svg xmlns="http://www.w3.org/2000/svg" width="20" height="20" fill="%23c8c7cb" viewBox="0 0 20 20"><path d="M5 8l6 6 6-6z"/></svg>') right 5px center no-repeat; padding: 10px 40px 10px 10px;}select::-ms-expand { display: none;}使用 HTML、CSS 和 Javascript 的文本到语音转换器。
最后,创建一个名为 script.js 的 JavaScript 文件并将以下代码粘贴到其中。请记住以 .js 扩展名保存文件。
const msg = new SpeechSynthesisUtterance();let voices = [];const voicesDropdown = document.querySelector('[name="voice"]');const options = document.querySelectorAll('[type="range"], [name="text"]');const speakButton = document.querySelector("#speak");const stopButton = document.querySelector("#stop");msg.text = document.querySelector('[name="text"]').value;function populateVoices() { voices = this.getVoices(); voicesDropdown.innerHTML = voices .filter((voice) => voice.lang.includes("en")) .map( (voice) => `<option value="${ voice.name}">${ voice.name} (${ voice.lang})</option>` ) .join("");}function setVoice() { msg.voice = voices.find((voice) => voice.name === this.value); toggle();}function toggle(startOver = true) { speechSynthesis.cancel(); if (startOver) { speechSynthesis.speak(msg); }}function setOption() { console.log(this.name, this.value); msg[this.name] = this.value; toggle();}speechSynthesis.addEventListener("voiceschanged", populateVoices);voicesDropdown.addEventListener("change", setVoice);options.forEach((option) => option.addEventListener("change", setOption));speakButton.addEventListener("click", toggle);stopButton.addEventListener("click", () => toggle(false));首先,我们将使用 new 关键字创建变量 message 的实例,并使用 let 关键字建立一个空的语音数组。
我们将选择所有 HTML 元素并使用 document.queryselector() 方法将它们的值存储在常量变量中。
现在我们将保存消息变量的值并使用文档来选择文本区域的内容。具有 HTML 名称的查询选择器。
现在我们将在函数内部创建一个函数 populatevoices(),使用 this.getVoices() 方法返回一个 SpeechSynthesisVoice 对象列表,表示当前设备上所有可用的语音。
现在我们将为它设置声音,我们将创建一个设置声音的 setvoice() 函数。
我们将创建一个带有参数 startover = true 的切换函数,如果 speech.synthesis 那么语音将在文本区域中说出消息。
现在我们将事件监听器添加到语音更改、停止和说话按钮。
现在我们已经使用 HTML、CSS 和 javascript 完成了文本转语音。我希望你理解整个项目。
现在,我们已经使用 HTML、CSS 和 javascript 成功地创建了文本转语音。您可以通过将此项目复制到您的 IDE 中来直接使用它。
责任编辑:华轩 来源: web前端开发 JavaScriptWeb 应用程序(责任编辑:热点)
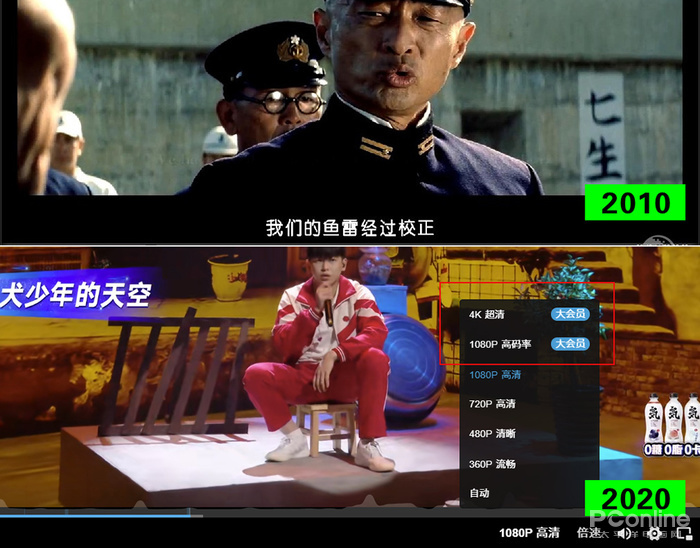
世界在建最宽独塔混合梁斜拉桥主塔基础工程完工 大桥全长1010米
 近日,由中国铁建所属中国铁建大桥局承建的世界在建最宽独塔混合梁斜拉桥——成都市东西城市轴线沱江大桥主塔承台浇筑完成,标志着大桥全面进入主塔施工阶段。东西城市轴线是成都市力推&l
...[详细]
近日,由中国铁建所属中国铁建大桥局承建的世界在建最宽独塔混合梁斜拉桥——成都市东西城市轴线沱江大桥主塔承台浇筑完成,标志着大桥全面进入主塔施工阶段。东西城市轴线是成都市力推&l
...[详细] 《街头霸王6》中的新增功能之一是解说员功能,包含了对于玩家比赛多个来自格斗游戏社区知名人物电竞风格的解说播报。根据格斗游戏社区油管账号 HiFight 最新视频展示,游戏中还有一些隐藏的动物解说员。演
...[详细]
《街头霸王6》中的新增功能之一是解说员功能,包含了对于玩家比赛多个来自格斗游戏社区知名人物电竞风格的解说播报。根据格斗游戏社区油管账号 HiFight 最新视频展示,游戏中还有一些隐藏的动物解说员。演
...[详细]《DOTA2》利雅得大师赛:Spirit夺冠获得500万美元奖金
 《DOTA2》利雅得大师赛于今早落幕,俄罗斯TI 10冠军战队Team Spirit 3:1击败液体夺冠,并获得高达500万美元的奖金。“经典亚军”战队液体获得250美元奖金,这也是液体战队本赛季收获
...[详细]
《DOTA2》利雅得大师赛于今早落幕,俄罗斯TI 10冠军战队Team Spirit 3:1击败液体夺冠,并获得高达500万美元的奖金。“经典亚军”战队液体获得250美元奖金,这也是液体战队本赛季收获
...[详细]又是受黑暗打工委托 秋叶原男子盗窃1300万日元宝可梦卡被捕
 如今流行于非法网络的黑暗地下打工越来越猖獗,7月28日东京警方宣布逮捕多名年轻无业男子,涉嫌盗窃巨额现金以及价值高达1300万日元宝可梦卡,动机居然又是受黑暗打工委托。本图仅为示例·短短几个月,日本已
...[详细]
如今流行于非法网络的黑暗地下打工越来越猖獗,7月28日东京警方宣布逮捕多名年轻无业男子,涉嫌盗窃巨额现金以及价值高达1300万日元宝可梦卡,动机居然又是受黑暗打工委托。本图仅为示例·短短几个月,日本已
...[详细]天保基建(000965.SZ):2020年净利降49.78% 基本每股收益0.0859元
 天保基建(000965.SZ)披露2020年年度报告,实现营业收入8.2亿元,同比下降32.59%;归属于上市公司股东的净利润9529.34万元,同比下降49.78%;归属于上市公司股东的扣除非经常性
...[详细]
天保基建(000965.SZ)披露2020年年度报告,实现营业收入8.2亿元,同比下降32.59%;归属于上市公司股东的净利润9529.34万元,同比下降49.78%;归属于上市公司股东的扣除非经常性
...[详细] 《炼金工房》系列新作《蕾丝莱利安娜的炼金工房》公开了新的PV,展示将在该作中登场的新主角,以及其他即将登场的角色,这部分角色都来自《炼金工房》系列的前作,莱莎、爱夏、托托莉都将亮相,新的PV还展示了战
...[详细]
《炼金工房》系列新作《蕾丝莱利安娜的炼金工房》公开了新的PV,展示将在该作中登场的新主角,以及其他即将登场的角色,这部分角色都来自《炼金工房》系列的前作,莱莎、爱夏、托托莉都将亮相,新的PV还展示了战
...[详细]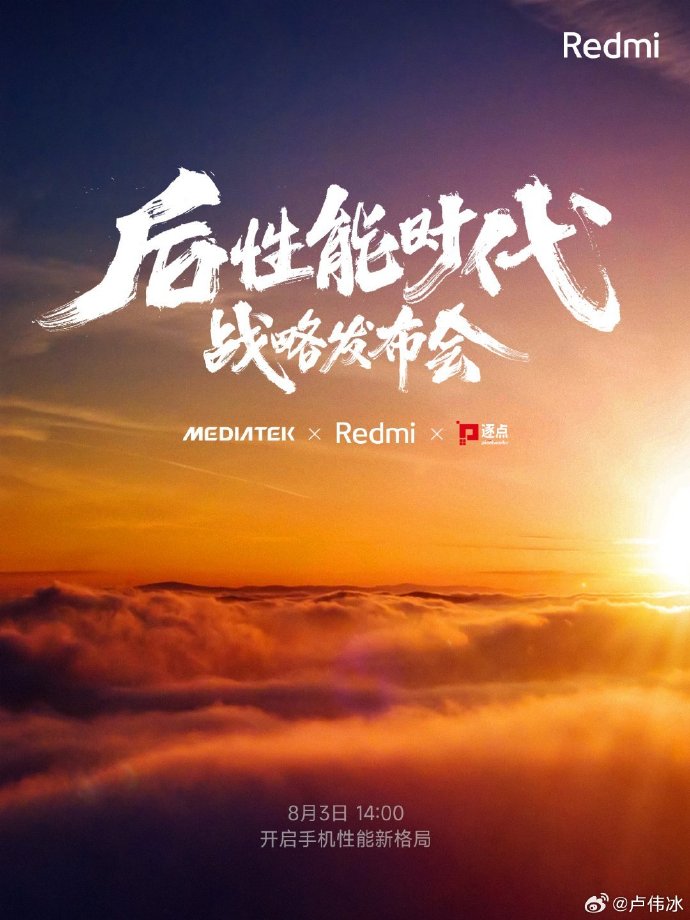 8月2日消息,今天早上Redmi总经理卢伟冰带来了一则消息,Redmi将联合另外两个品牌举办一场后性能时代战略发布会。“【官宣】 Redmi x MediaTek x Pixelworks明天下午 2
...[详细]
8月2日消息,今天早上Redmi总经理卢伟冰带来了一则消息,Redmi将联合另外两个品牌举办一场后性能时代战略发布会。“【官宣】 Redmi x MediaTek x Pixelworks明天下午 2
...[详细]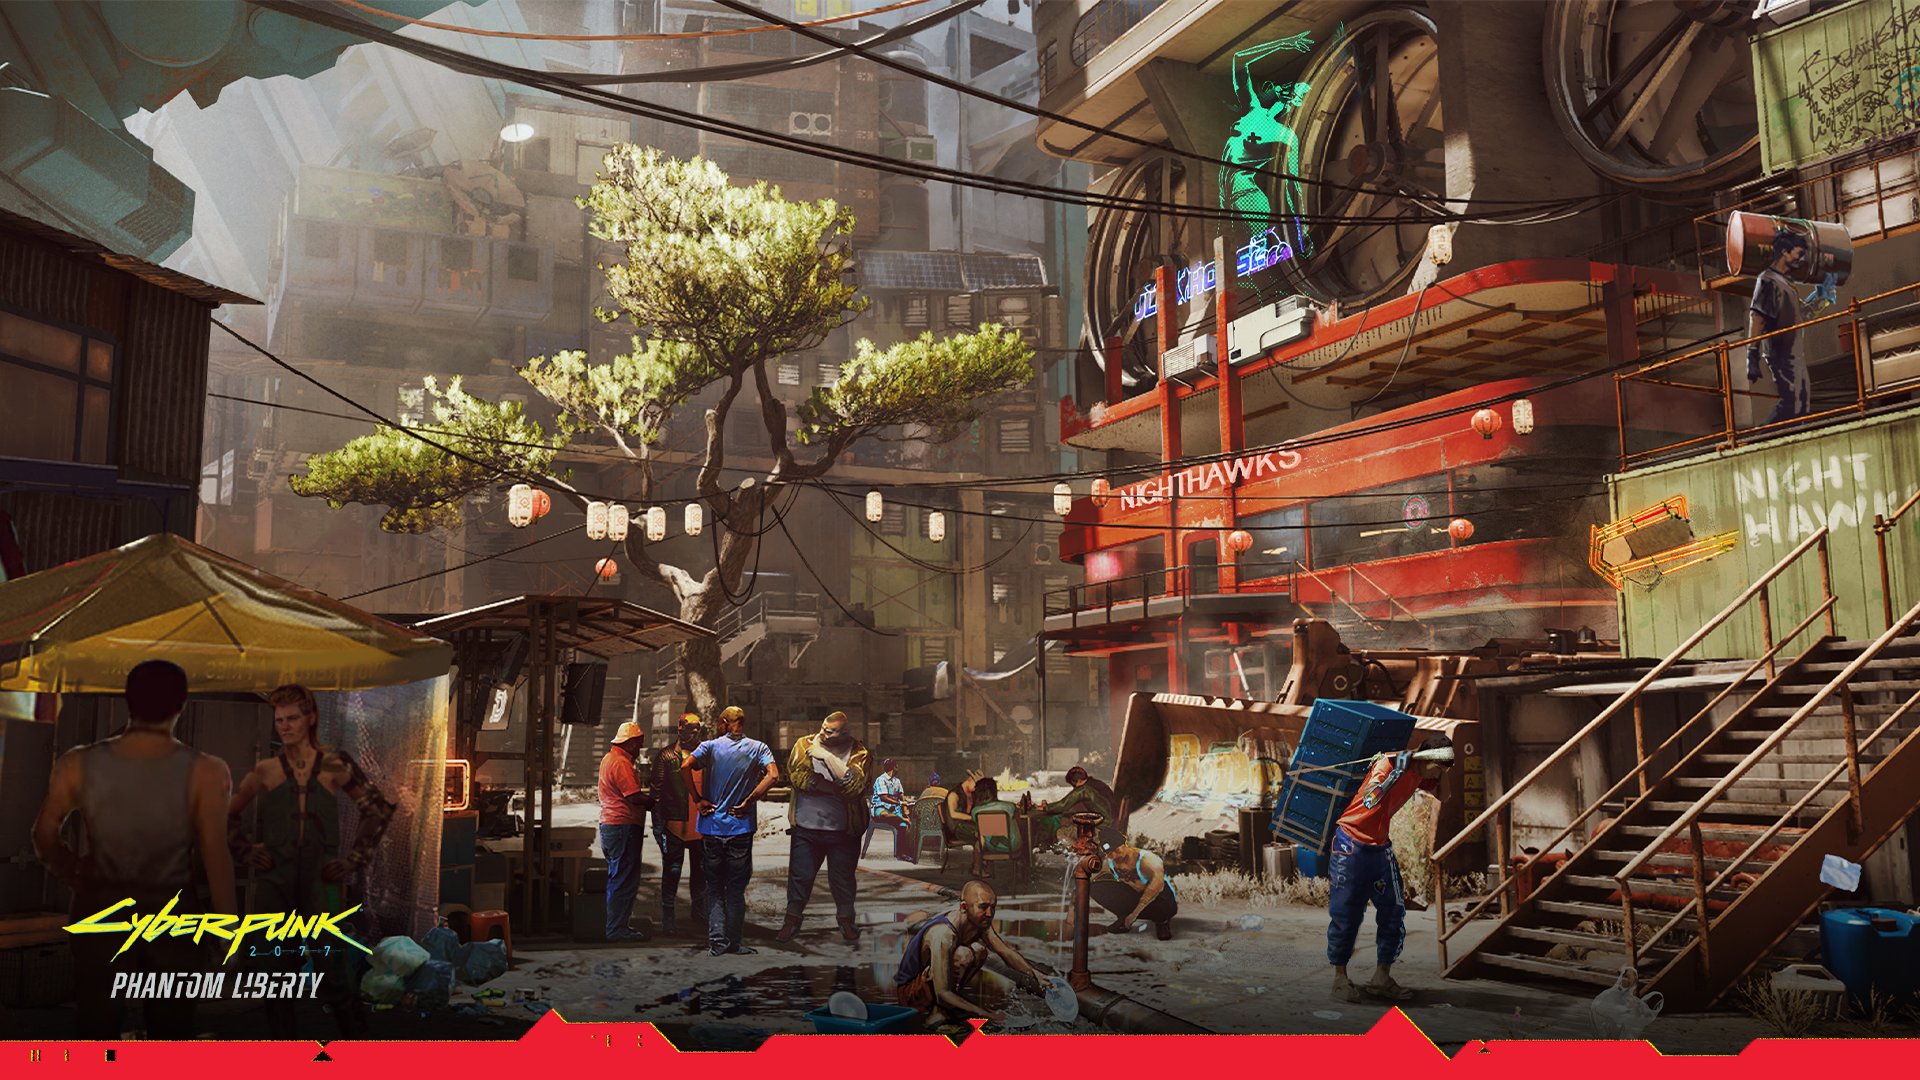 CDPR发布了《赛博朋克2077》DLC“往日之影”的新概念图“狗镇的一天”。狗镇的一天每一天,新来的都带着对美好生活的期待翻过狗镇的墙壁。有些人是来避祸的,但大多数人为了逃离他们黑暗的过去。可惜的是
...[详细]
CDPR发布了《赛博朋克2077》DLC“往日之影”的新概念图“狗镇的一天”。狗镇的一天每一天,新来的都带着对美好生活的期待翻过狗镇的墙壁。有些人是来避祸的,但大多数人为了逃离他们黑暗的过去。可惜的是
...[详细]鑫科材料(600255.SH):向激励对象授予股票期权4969万份 行权价格为2.38元/份
 鑫科材料(600255.SH)公布,根据《上市公司股权激励管理办法》、《公司2021年股票期权和限制性股票激励计划(草案)》的相关规定及公司2020年年度股东大会的授权,公司董事会认为本次股权激励计划
...[详细]
鑫科材料(600255.SH)公布,根据《上市公司股权激励管理办法》、《公司2021年股票期权和限制性股票激励计划(草案)》的相关规定及公司2020年年度股东大会的授权,公司董事会认为本次股权激励计划
...[详细] 港服PlayStation Plus三档会员新增了试玩游戏:《巫师3狂猎 完全版》,订阅服务的玩家可以最多试玩4个小时该游戏,购买正式版后,所有试玩的进度和奖杯都将被继承。您是利维亚的杰洛特,收钱办事
...[详细]
港服PlayStation Plus三档会员新增了试玩游戏:《巫师3狂猎 完全版》,订阅服务的玩家可以最多试玩4个小时该游戏,购买正式版后,所有试玩的进度和奖杯都将被继承。您是利维亚的杰洛特,收钱办事
...[详细] 全面注册制的影响有哪些 对A股估值的影响你知道吗?
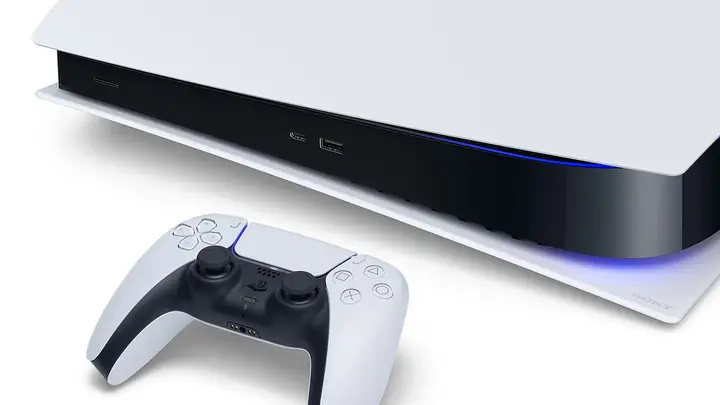 PS5主机全球首次降价后 英国销售量猛增75%
 官方确认:《堕落之主》PS5和XSX/S版支持60帧率运行
 会买吗?iPhone 15/15 Plus渲染图曝光 5种配色+双摄
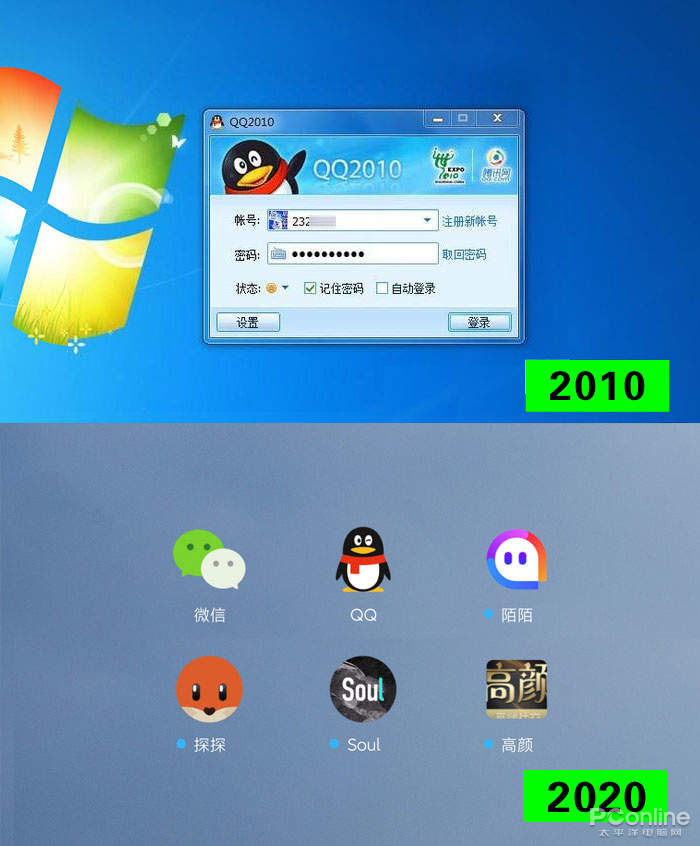 东方国信(300166.SZ)公布消息:拟使用节余募集资金永久补充流动资金